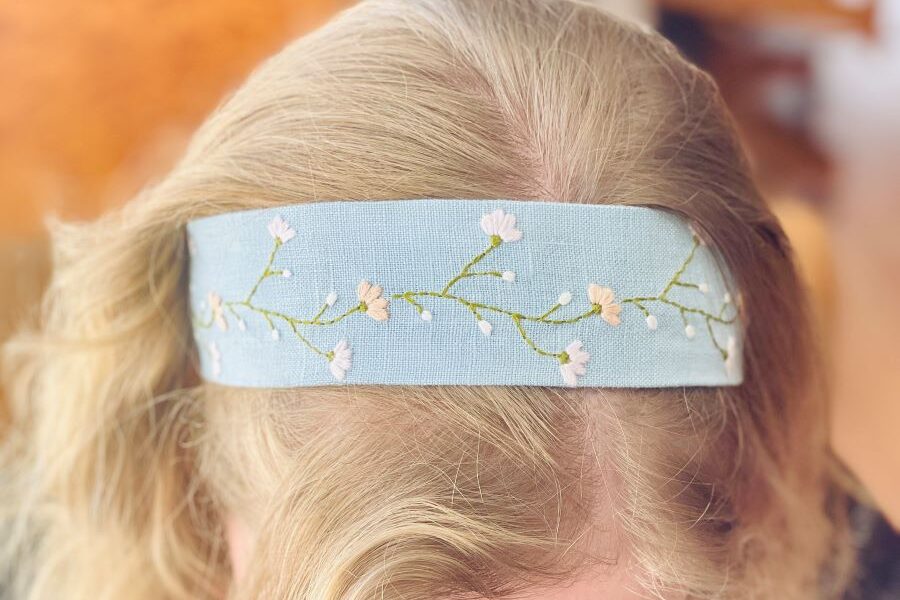
How to Make a Simple Embroidered Headband
What We’re Going to Be Doing Today – How to Make a Simple Embroidered Headband
It has been so very long since I wrote a blog post, and I am so excited to be back! Instead of showing you how to make an embroidered wall art piece like I usually do, today I’ll be showing you how to make a simple embroidered headband. I’m super excited to get into making things that are a bit more practical and can be used around your home to make it cozier and more welcoming.
Embroidered Headbands – Is There Anything Sweeter?
How to make a simple embroidered headband – isn’t that just such a sweet idea? I think an embroidered headband is just the prettiest, cutest, most feminine little addition to your wardrobe. It’s very easy to make, but there is a bit of sewing required, so if that’s not your thing, feel free to pass this post by.
Why a Cloth Headband?
That’s a great question! There are several reasons why I think a cloth headband is a better option than say an elasticized or plastic headband. Here are 3 reasons why:
1. They’re Adjustable
Elasticized headbands are great, but they always eventually stretch out and become too big. With cloth headbands, you can tighten it as much as needed to fit your head. I have a smaller head than most people, so this works great for me.
2. They Don’t Hurt Your Head
Plastic headbands always hurt my head right behind my ears where the ends of the headband dig in. I can only wear them for a couple of hours before I start to go crazy and have to take them off. Cloth headbands are gentle and they don’t hurt your head.
3. They’re cheap
All you need for a cloth headband is any long strip of plain fabric, which you probably already have.
Now that we know why we’re going to be making a cloth embroidered headband, let’s get into the materials we’ll be needing.
Materials
- Plain fabric of any colour – 8″ tall x 40″ wide. If you want a longer tail that sticks out at the back of your hair, feel free to do longer than 40″
- Hoop – 5″ or 6″
- Water-soluble marker or heat-erasable pen. Here’s a good one I’ve found: Black Frixion Pen for Embroidery Pattern Transfer, Heat Erasable Transfer Method, Hand Embroidery Supplies, Pilot Disappearing Ink – Etsy Canada
- Embroidery needle
- Seam ripper or scissors
- Embroidery floss – any colours you want
- Sewing machine
What Pattern To Use
For your headband, you can really use any pattern you want. Or if you don’t need one, you can just trace right onto your fabric. If you’d like, I have provided a few patterns at the bottom of this post.
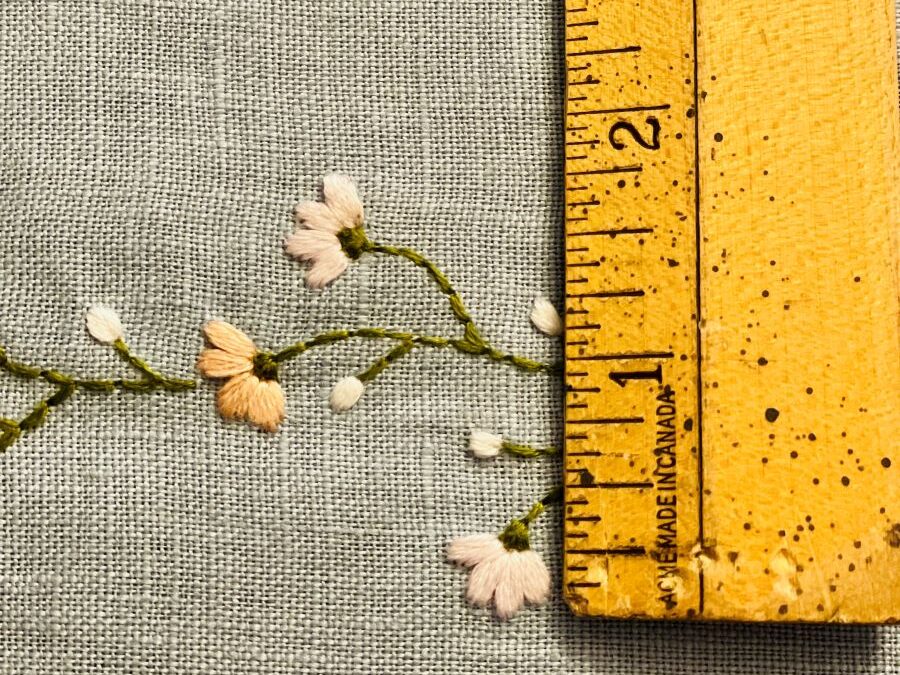
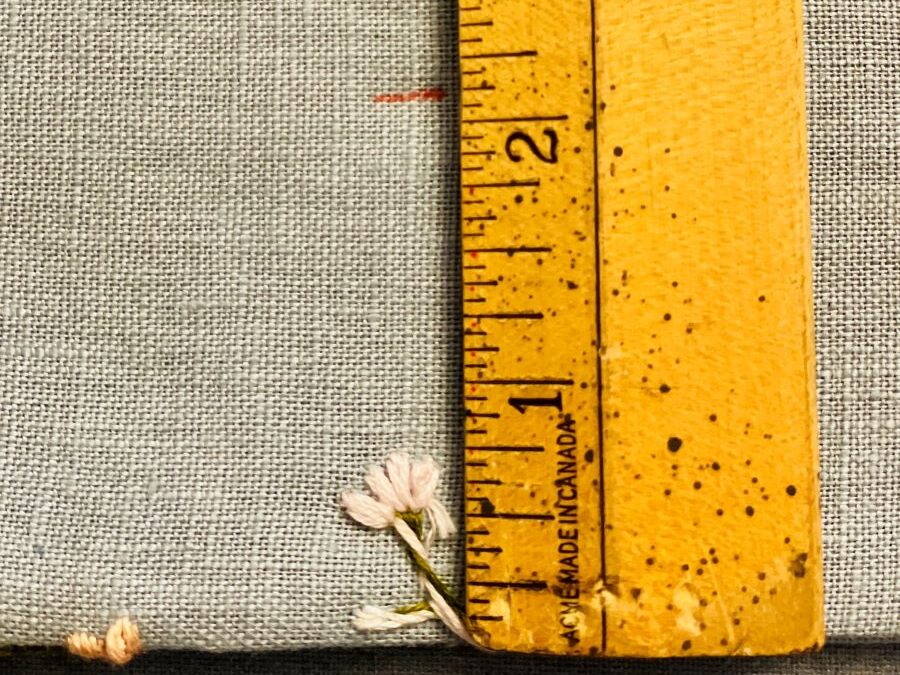
You want the embroidered portion to stretch from ear to ear. I measured my head and that distance was about 12″, but yours might be bit bigger. I think 12″ would work well for anyone, but if you want, you can measure your head from ear to ear and make your pattern a bit longer.
Step 1 – Your Fabric Size
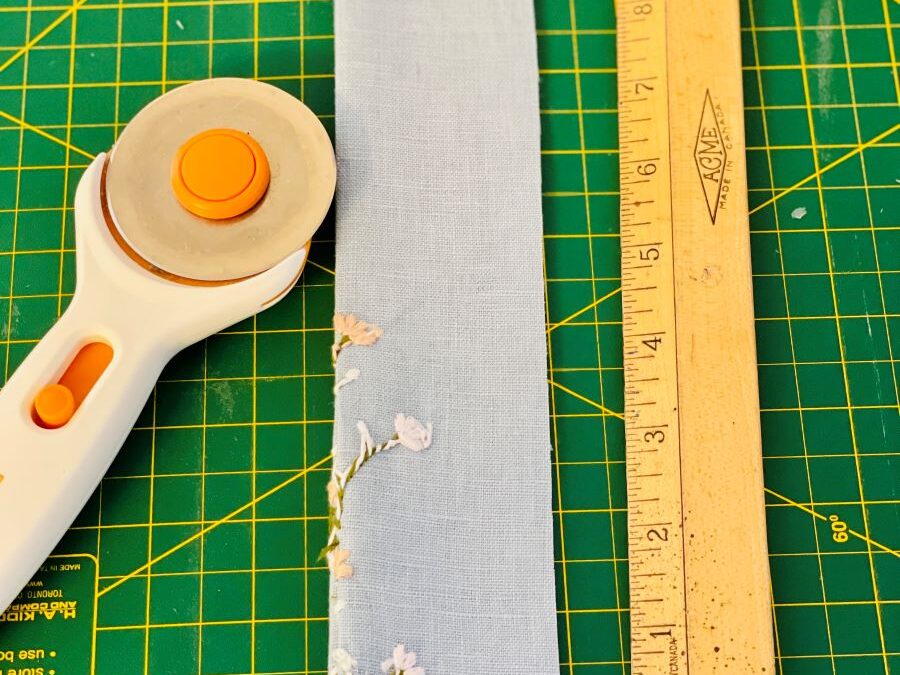
Our finished piece (before we sew it together) is only going to be about 4.5 inches tall. To make it easier to work with a standard 6″ hoop, I went with an 8″ tall piece of fabric by about 40″ long. If you want a longer tail, you can cut a longer strip. For the purpose of this tutorial, we’ll stick to 40″ long.
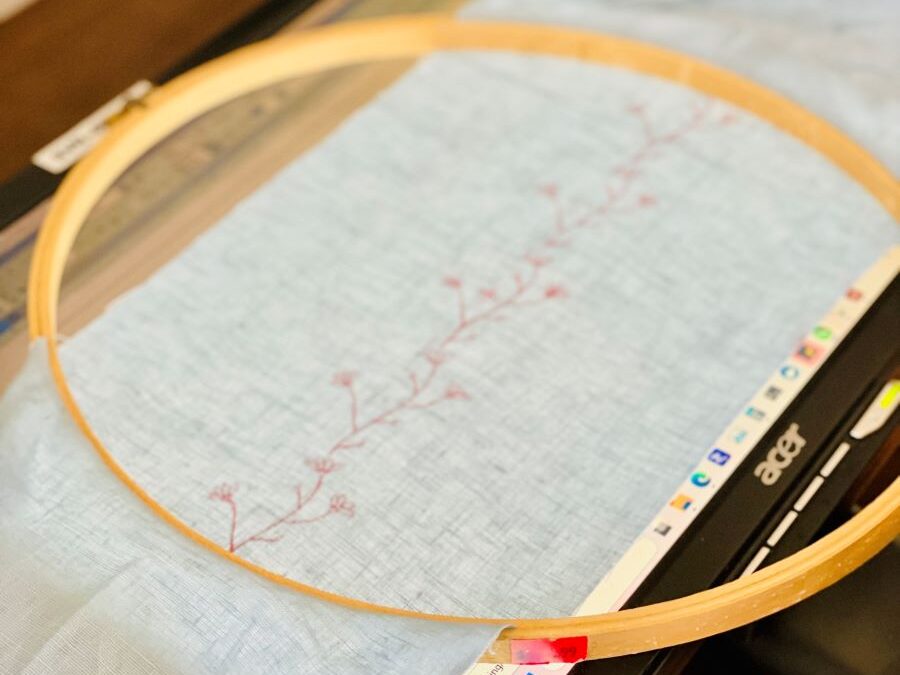
Step 2 – Trace Your Pattern Using a 12″ Hoop
Because our pattern size is 12″ long, I decided to stick my fabric into a 12″ hoop so I could trace the whole pattern all at once. Unfortunately, because the fabric is only 8″ tall, it doesn’t fit all the way in the hoop. Seeing as we’re just quickly tracing it, that’s okay.
I literally stick my hoop and fabric right on top of my computer monitor screen and use it as a lightbox. If you can freehand, good for you, but I always need a pattern to follow. No free-handing for this gal!
Here’s a blogpost I wrote that has a bit more information about transferring patterns onto fabric: Everything You Need to Know About Starting Your First Embroidery Project – Friendstitch Embroidery
Step 3 – Transfer to Smaller Hoop and Embroider the Pattern
I transferred my pattern over to a 6″ hoop. You could do a 5″ or 7″ if that works better for you, but seeing as we cut out an 8″ tall strip of fabric, using a 6″ hoop works well. That way there is enough fabric on the top and bottom of the hoop to still tighten it when you need to.
Because we’re using a 6″ hoop on a 12″ pattern, you’ll need to work the piece in sections. I needed to move my hoop twice in order to get everything done. If you’re using a relatively stable piece of fabric like linen or cotton, this won’t cause any issues.
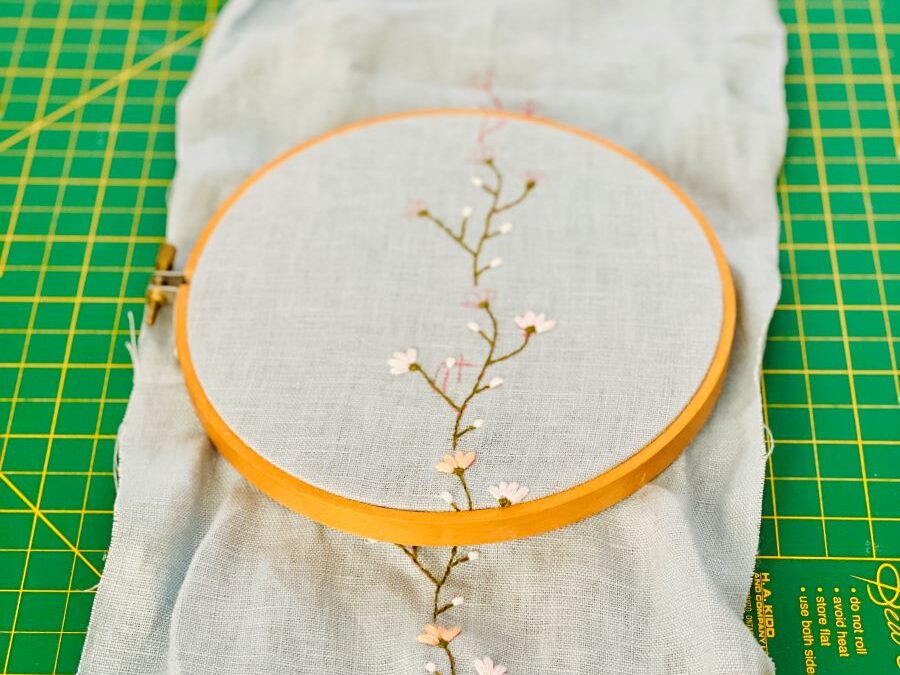
As you can see, I did the first section, then moved it and did the second section, and then moved it one final time to do the last section.
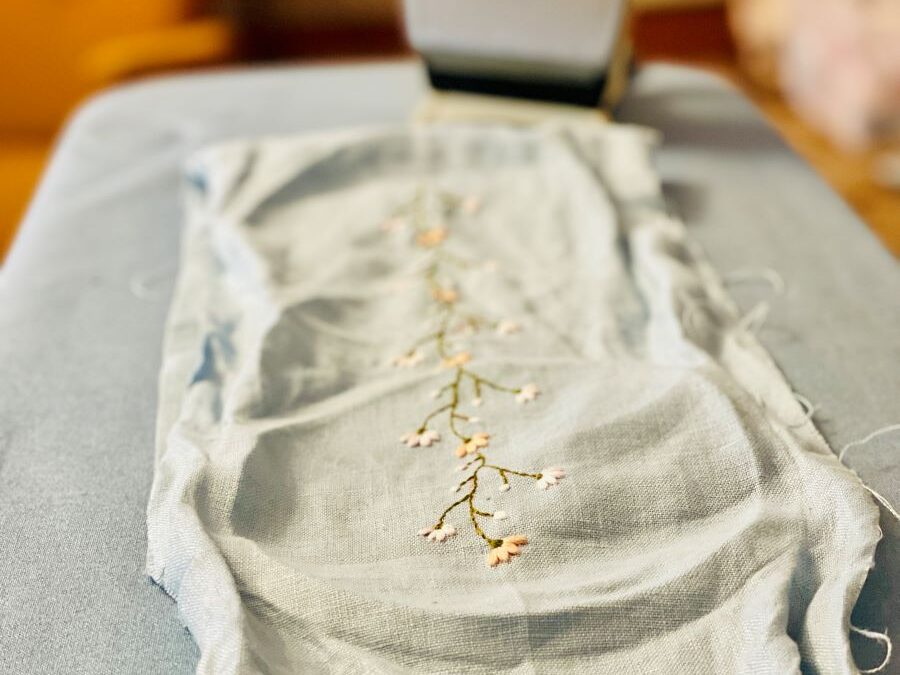
Step 4 – Iron the Strip of Fabric
Once you’re finished embroidering the pattern, take it out of the hoop and iron out the whole strip of fabric.
Step 5 – Trim the Excess Fabric
We will be trimming the excess fabric so that it matches the finished size we need. My pattern is 1 3/4″ tall.
We will be doubling that size, then adding on 1/2″ for seam allowance, as well as another 1/4″ so that your pattern isn’t at the very edge of your finished piece. So that means you will be trimming the strip of fabric down from 8″ to 4 1/4″. You can fiddle with these numbers a bit to work for the size of your pattern if you need to. Just make sure you double the height of the pattern, then add on 1/2″ (1/4″ per side) seam allowance, and then a bit more like a 1/4″. That way when you sew the whole piece together, the pattern isn’t at the very edge of the headband.
Turn your piece over so that the backside is showing and fold it in half hot-dog style. From the bottom of the strip, measure out half of the finished size we need. In this case, seeing as our total size needs to be 4 1/4″, that will be 2 1/8.
Make marks every several inches over the width of the fabric at 2 1/8″ so that you can use them as a guide when you go to trim. Before I cut everything, I like to iron along the fold so that it’s nice and stiff and nothing moves while I’m doing it. I also fold at the centre of the piece, so that both ends of the strip are together. This will help with the next step, and will also make the length that you have to cut through shorter.
Cut the fabric down to the measured lines. You will now have a section of fabric that’s folded in half that equals to 4 1/4″ tall by 40″ long when unfolded.
Step 6 – Measure 3/8″ From Raw Edge
In order to get a pointed v shape for the final product, we need to make a couple of cuts to the ends of the strip. Remember that you folded the piece in half so that both ends were together. Make sure they are nicely lined up. You can’t really tell in this photo, but both ends are here. The folded edge is on the left side of the photo.
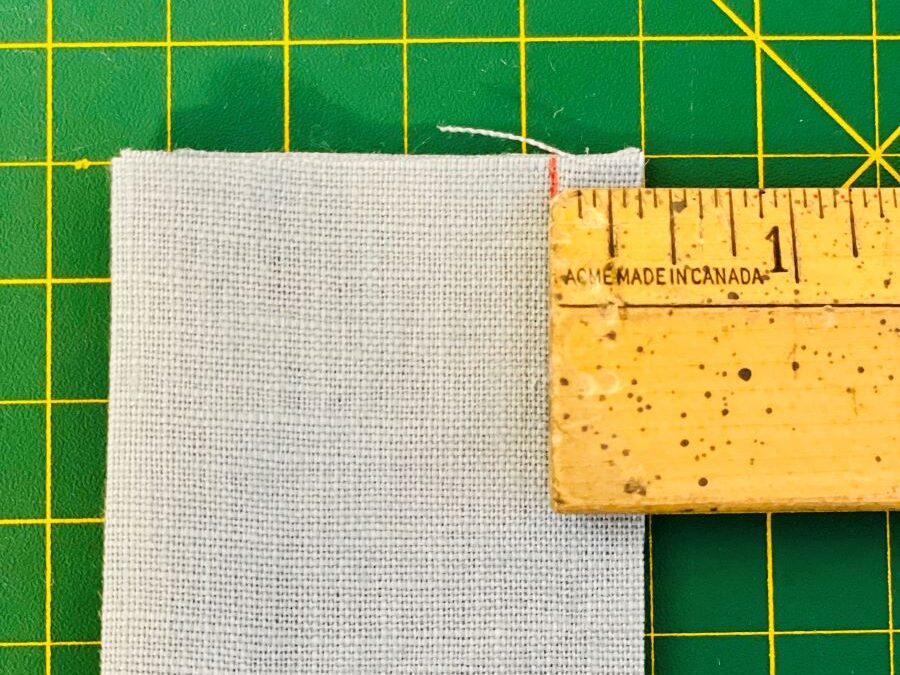
Measure 3/8″ from the raw edge (NOT the folded edge). You are doing 1/4″ because that’s how wide our seam allowance is going to be, and then an extra 1/8″ for wiggle room.
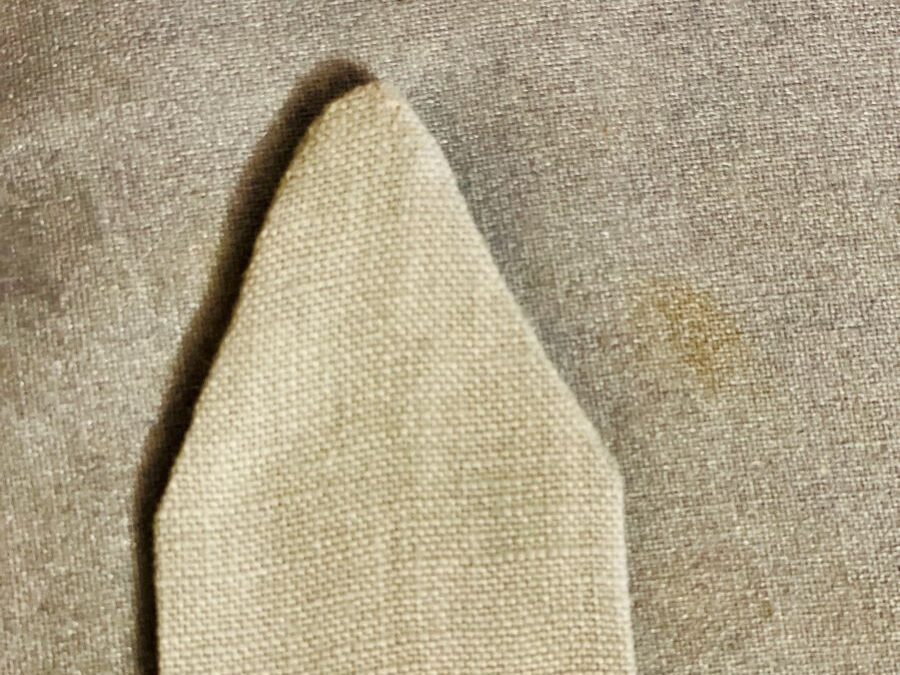
Step 7 – Cut the Ends Into a V Shape
From the top of the edge of the strip, we will measure 1 3/4″ down in the centre. Then, we’ll draw a line from each edge to the new centre.
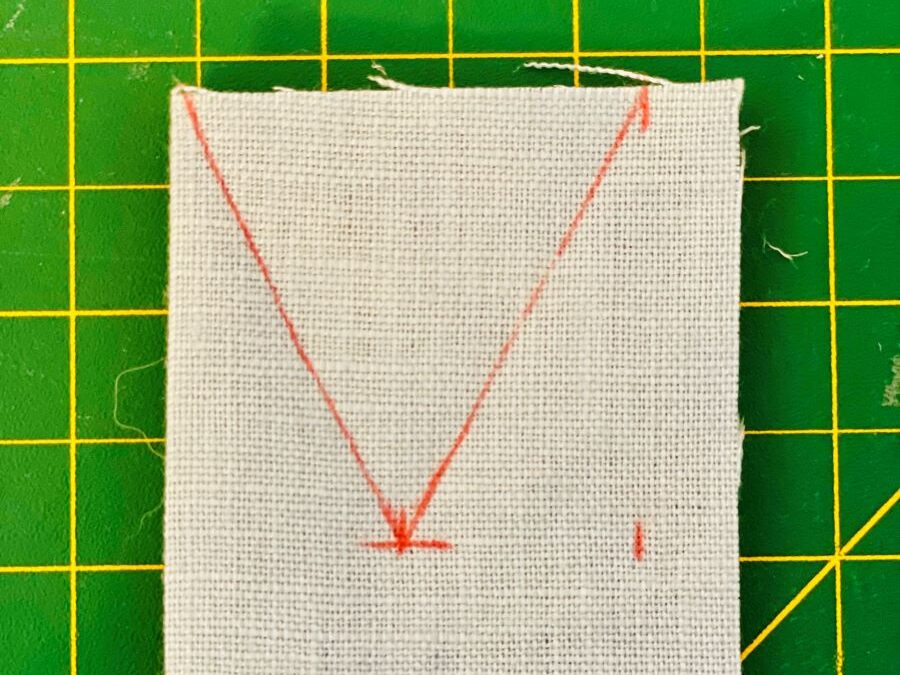
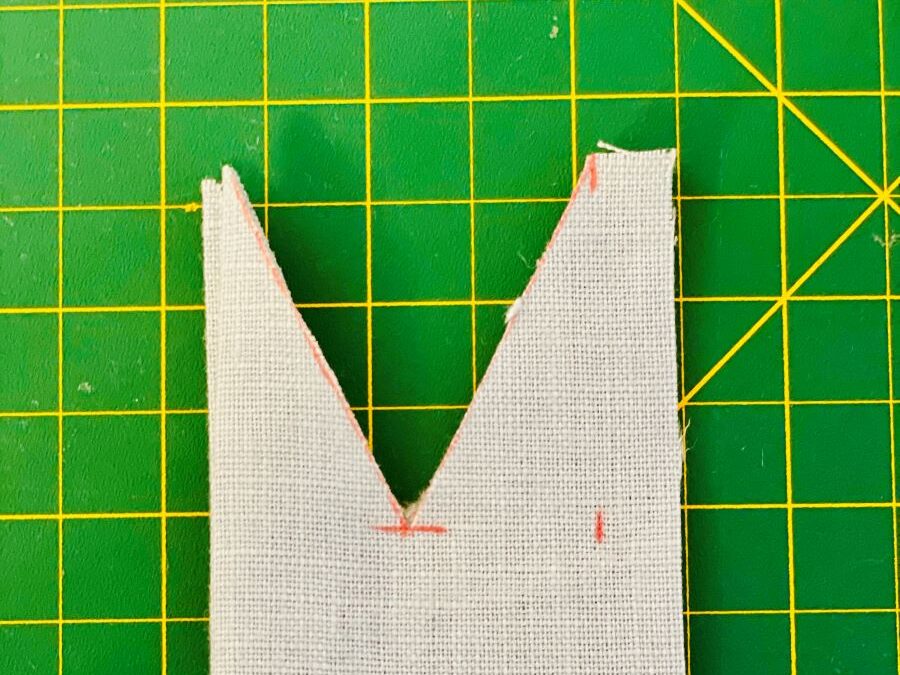
Now you will cut along v-line you just created. It will look like this.
Step 8 – Mark a Line From the Centre of the Piece and Sew the Raw Edges Together
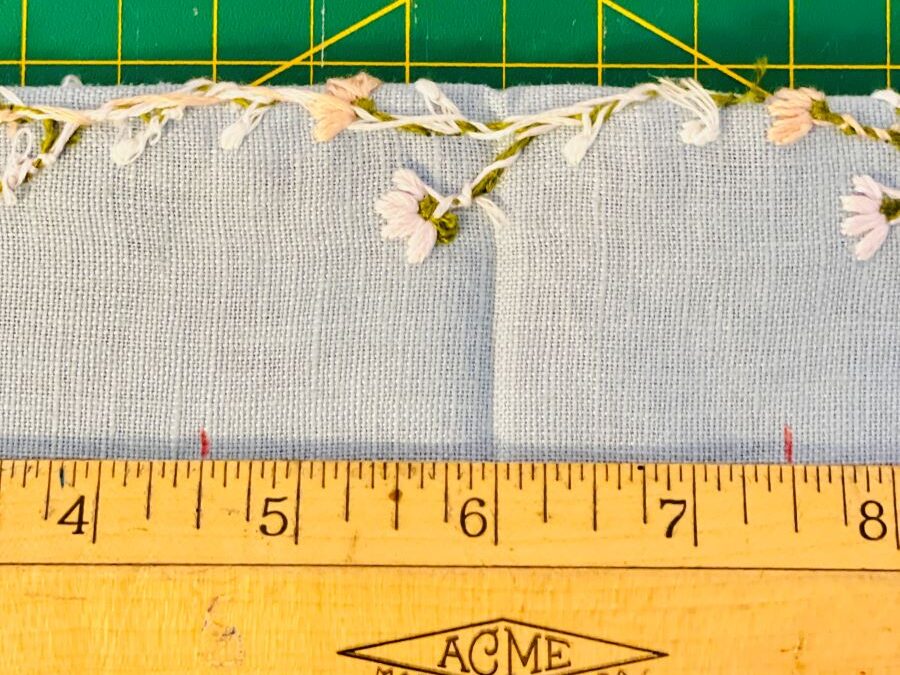
At this point your piece is still folded in half. Open up the width of the piece so that both ends are no longer together. Your piece should still be showing the backside. From the very centre of your piece, which should be about 6″, make a mark 1 1/2″ away on either side of the raw edge. The reason that we’re doing this is so that we have a hole that we can use to turn the piece right side out once we’ve sewn the two edges together.
Now you will be sewing your raw edges together, all the way to where your marked centre lines are. Your piece should be folded in half still. You’ll be starting at the top of the edge where the red line was marked from step 7 (the second photo).
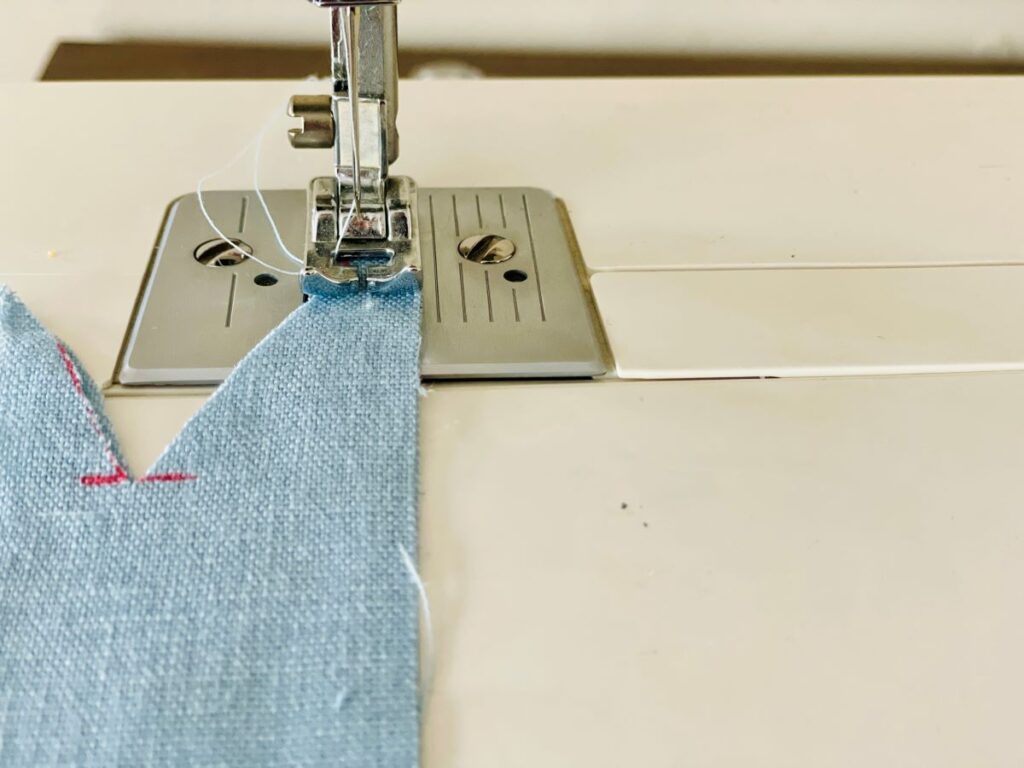
Sew all the way down until you reach your first mark that’s 1 1/2″ inches away from the centre. Make sure you backstitch nice and neat and secure at this stage. Lift the sewing foot, cut the threads, and then move your foot onto the second mark that’s 1 1/5 inches away from the centre, and sew all the way down until you get to the other end.
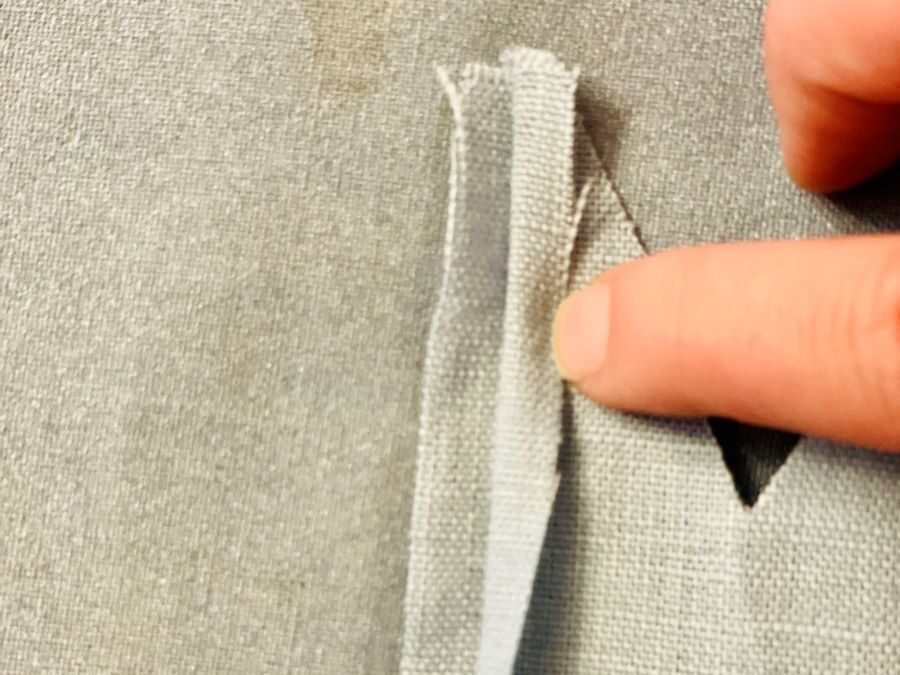
Step 9 – Iron Open Your Seam
Now that you’ve sewn the length of the headband, iron open each side of your seam. This helps the headband to lay flat once it’s done. I do one side at a time, and kind of use my finger to slide down the length of the fabric while I’m ironing with my other hand.
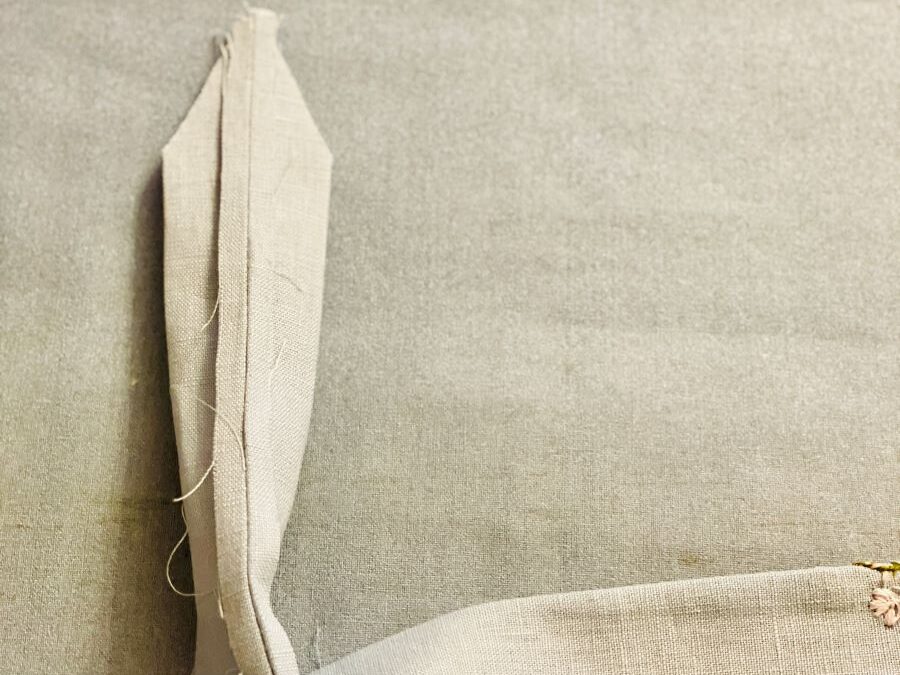
Step 10 – Sew the Two Ends Into an A
Now that you’ve sewn all the way down the edge of the headband, we are going to sew the two ends where we made the V cut into an A.
Pull at the bottom of the point on either side of one of the headband ends so that it pulls apart and turns into an A. Your ends will kind of be going one direction, while the rest of the headband is going another direction. It’ll look like this.
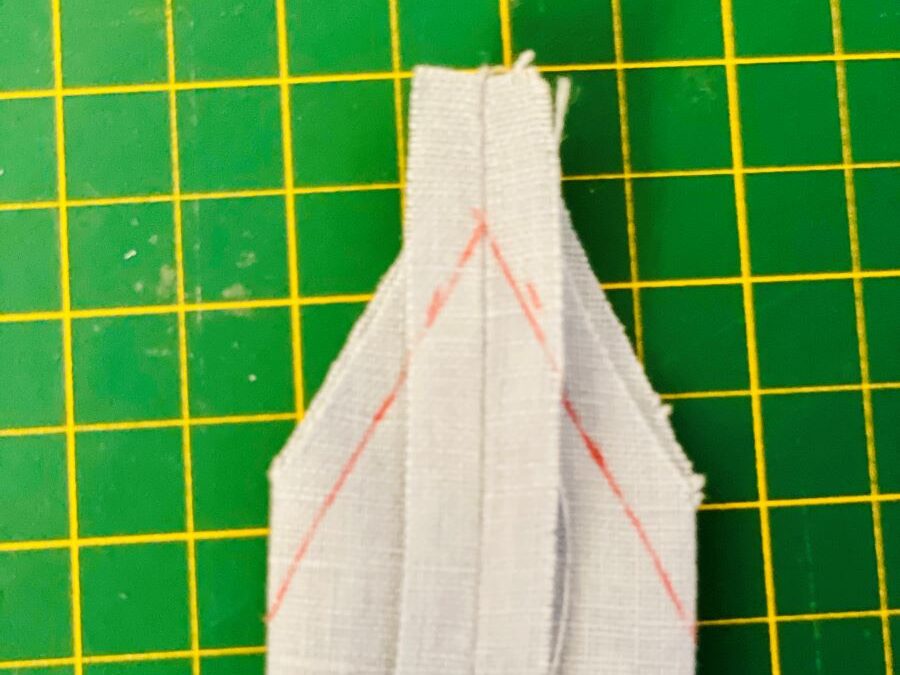
Now sew the A shut on each end. As you know, I can freehand nothing, so I draw lines as a guide for where to stitch. This is what the lines will look like that I’m sewing. Once you’re done, trim the corner as close to the stitches as possible to reduce bulk in the corner when you turn it the right side out.
Step 10 – Turn the Headband Right Side Out
Turn your piece right side out using the centre of the farbic where you didn’t stitch as a way to pull the two ends out. I use the tip of a paintbrush to poke the very tip of the A as pointy as possible. The backside of the headband will look like this.
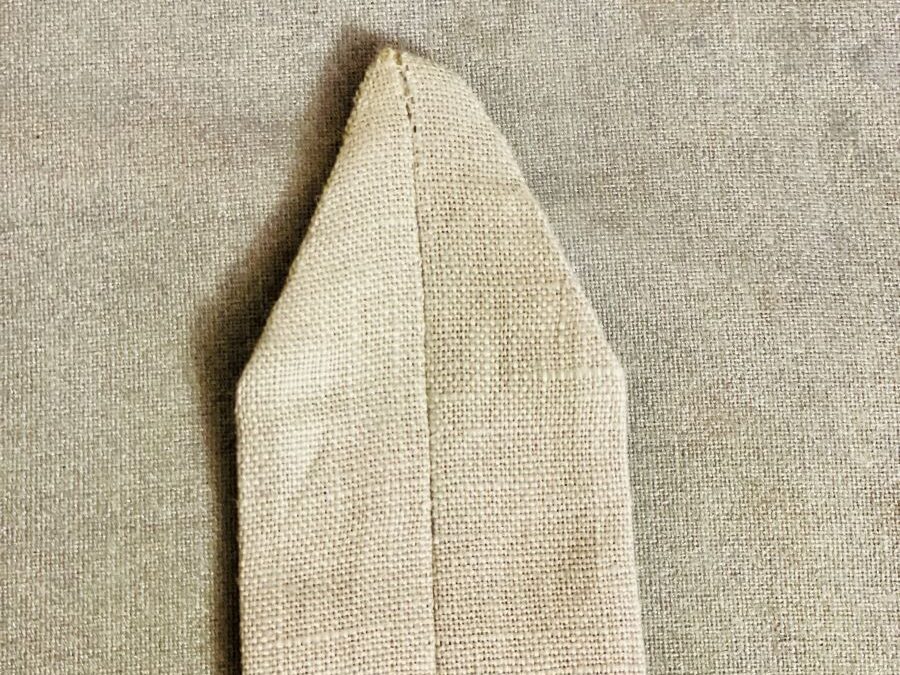
And the right side will of course look like this.
Step 11 – Iron Everything Flat and Enjoy
Okay, that’s pretty much it! Now you just have to iron everything out so that’s it nice and flat and crisp. After that, it’s ready to wear. When you put it on, you may find that it works best to tie your hair up in a ponytail first. If you don’t, your hair might get caught in the knot you’re trying to make. Do whatever works best for you. Either way, I’m sure it will look great! Thanks for visiting my blog and following along as I showed you how to make a simple embroidered headband.

Patterns
Feel free to use any of the patterns in this file. They are all about 12″ long. Or just go ahead and use whatever works best for you.
Feel free to leave any comments or questions below!