Taste and See Scripture Floral Embroidery Pattern

Today I’m excited to share this Psalms 34:8 floral scripture embroidery pattern with you – for free!
Most people who create embroidery wall art choose to display their piece right in the hoop. If you’re happy with that look, all the power to you. However, I don’t prefer the finished piece to be displayed in a hoop, mainly because I think artwork should have a proper frame, and an embroidery hoop doesn’t have a thick enough edge, and it also has that unsightly screw. For that reason, I have included a couple of different sizes so you can display the finished piece in a hoop, as well as the size of the square frame that I put my piece in. You can choose whatever size works best for what you. As well, if none of the sizes suit your needs, you can just resize one of the patterns when you go to print. I have done this lots of times. I really like small, cute pieces, so I have often had to resize the pattern when I go to print.
Quick disclaimer: this is my first pattern, and to be honest, I don’t absolutely love the colours I chose. Feel free to change one or two or all of the colours to fit your favourite colour palette, I won’t be offended!
Here’s the pattern:
Materials:
1. Fabric of your choice, but preferably a white or cream colour
2. Fabric pen – water soluble or heat soluble (I just got the Frixion pen and it works great!)
3. Embroidery Needle
4. Scissors or seam ripper
5. Embroidery hoop (5″-8″, depending on how big you want your finished piece to be)
6. Embroidery floss: Anchor 159, 1035, 862, 890, 234, 351, 387. I only have access to Anchor embroidery floss, but if you prefer to use DMC, the colours you would need are DMC 827, 930, 520, 729, 762, 400, ecru.
When I did this pattern, I knew I had square 3.5×5″ size frame that I wanted to use, but I have included a few different sizes for you to use in case you want a different size. In that case, you may want to add or subtract 1 or 2 threads. For example, if you are doing the 8″ hoop, when I say to use 5 strands for the flower petals, you could go ahead and use 6. Or if I use 2 strands for the stems, use 3. If you’re doing the 5″ or 6″ size, I think you can leave the thread amounts the same as what I used with the 3.5×5″. Note: The pattern for the 5″ hoop and the 3.5×5″ is the exact same size, so there is no need for any adjustments on that one.
- Trace the pattern onto your piece of fabric. I like to use the flashlight-pan method (you can find out how to do that on my first blog post here at the bottom of the page), or you can just look up how to transfer a pattern onto fabric.
- Using 5 threads of Anchor 159 (DMC 827), fill in the flower heads with a satin stitch.

- Once you have filled in both flowers, use 2 threads of the Anchor 1035 (DMC 930) and add the accent strokes. You should only need about 6-12 strokes per petal. Make sure they’re all close together and spread out into sort of a V pattern.

- Using 2 threads of Anchor 862 (DMC 520), fill in the green leaf steams with a stem stitch.

- Using 5 threads of Anchor 862 (DMC 520), fill in the leaves using a fishbone stitch.

- Using 3 threads of Anchor 890 (DMC 729), fill in the yellow flowers with a satin stitch.

- Using 2 threads of Anchor 234 (DMC 862), fill in all the grey stems with a backstitch (sorry, I forgot to take a picture).
- Using 2 threads of Anchor 234 (DMC 862), fill in the grey flowers with a lazy daisy stitch.

- Using 3 threads of Anchor 234 (DMC 862), fill in the grey leaves with a satin stitch (oops, I forgot this one as well!)
- Using 3 strands of Anchor 351 (DMC 400), fill in the tulip-looking flower with a satin stitch.

- Using 2 strands of Anchor 862 (DMC 520), fill in the tulip-looking flower stem with a stem stitch, then the petals along where the stem meets the flower with a satin stitch.
- Using 2 strands of the Anchor 387 (DMC Ecru), fill in the flower centre with a French knot. I start on the outer edge and go all the way around 1 time, and then work my way in.

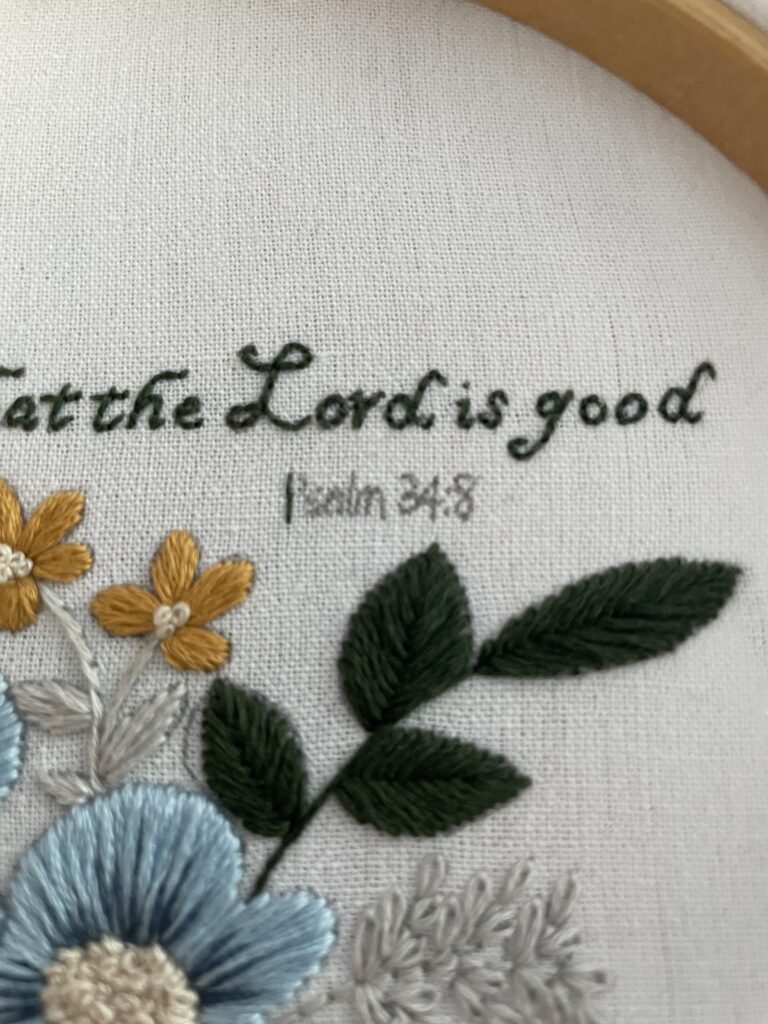
- Using 2 strands of the Anchor 862 (DMC 520), fill in the scripture verse with a back stitch. When you get to the reference (Psalm 34:8), only use 1 strand. If you are doing the circular pattern where the LORD IS GOOD is in a different, bigger font, fill that in using 3 strands with a long and short stitch.
- Go back and fill in all the areas you forgot. Alternatively, don’t be like me and forget to fill in the little stems at the bottom of the piece; do them at the same time you do step 4.
- Lastly, if you’re using a water soluble pen, gently run the piece under lukewarm water and then hang it to dry overnight. This is how I have done all of my patterns since I started, except with this one. Most fabric stores will sell water soluble pens but not heat soluble pens, so if all you can get is water soluble, that’s great. The only caveat is that you have to wait for it to dry. For this piece, I actually bought the Frixion heat erasable pen, and that worked even better because I didn’t have to wait for it to dry. I literally just used my hair straightener and pressed it over the stitches and pattern to remove the pattern. You could of course also use an iron.
Like I said earlier, lots of people like to leave their piece in the hoop. If that’s your style, go ahead and do that. Make sure that you pull the fabric nice and taught and then sort of stitch the fabric at the back closed so that it can sit snug against the wall. I’m sorry, I don’t have a tutorial for that, but you can do a quick google search to learn how to do it. Put in something like “how to finish off an embroidery piece.”
I prefer to put mine in a frame of some kind. EIther a square frame, or if you’re able to, in a circular frame. There are some precious circular wooden designs you can find on Etsy, and the finished piece looks brilliant in those. They aren’t cheap, though, so I often just keep a lookout whenever I go to the thrift store and hope I get lucky. That being said, if all you can find is a square frame, I think that also looks lovely, and I have finished and sold most of my pieces that way. When using a square frame, it will usually come with a pane of glass and some sort of wooden or cardboard backing. Using a clear craft glue, I glue the fabric as snuggly as I can around the piece of glass. Once the glue has dried, I fit the backing onto the frame, and then it’s ready to go. This creates a really nice, beautiful piece that looks clean and professional.
Alright, there you have it, a nice little embroidery piece to work on. If you have any questions or think I’ve missed any information in this pattern, feel free to say so in the comments. Thanks for spending your time here with me!


